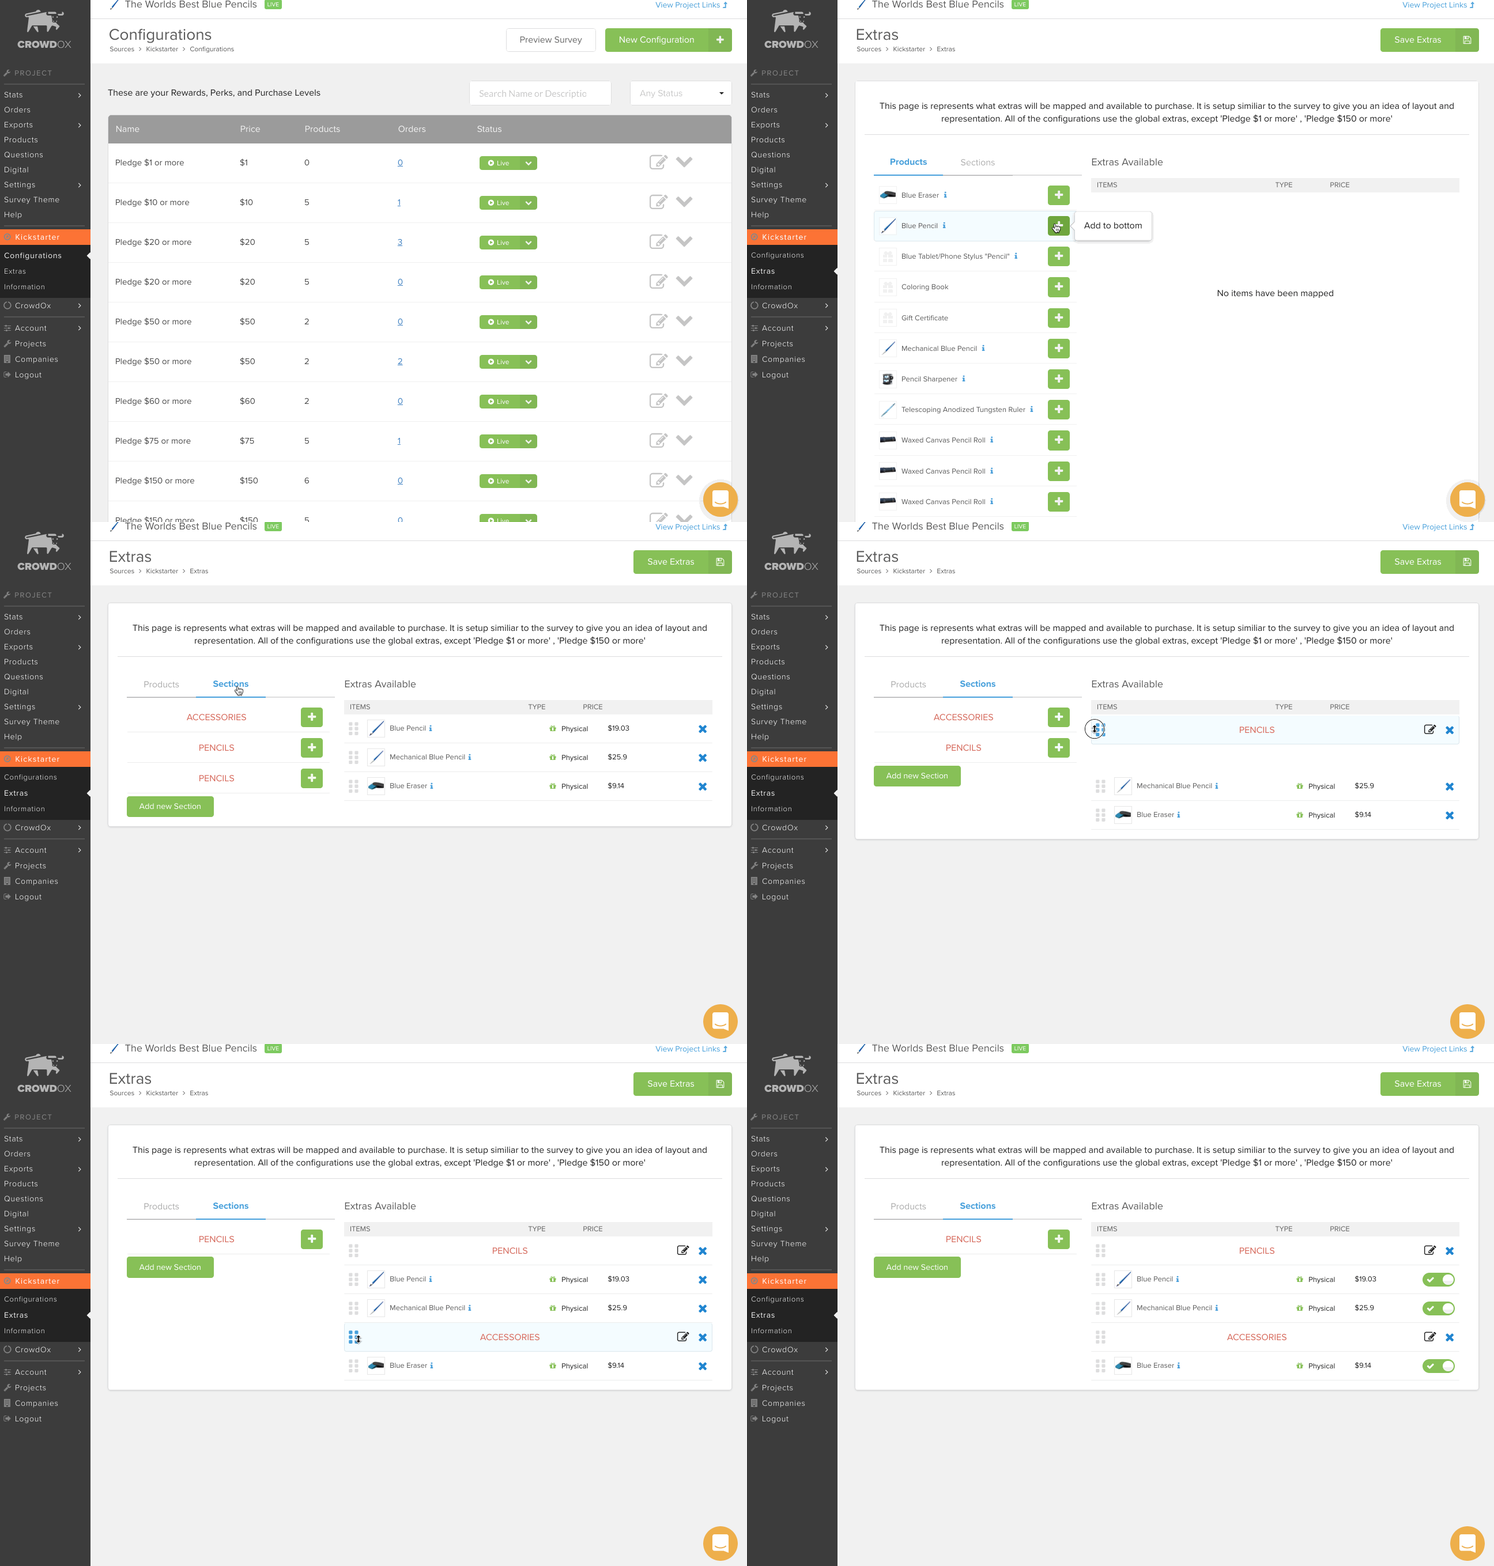
If you plan to offer add-ons to your backers (or if you already have promised them in your campaign), you'll need to map the products you want to offer to your survey's Extras page. There are a few different ways to achieve the Extras offerings you envisioned when you set up your crowdfunding campaign.
Global vs. Custom Extras
There's two ways to set up Extras, depending on how you want to structure your offerings. Global Extrasare extras you can offer to all of your pledge levels. Custom Extras can be tailored to individual pledge levels.
Let's say you want to offer an extra Widget to all your backers for $49, even though the initial pledge levels were at $29 for the Super Early Bird Widget level, $39 for the Early Bird Widget level, and $49 for the Kickstarter Special Widget level. Your Widget product should have a price of $49, and then it can be mapped to Global Extras.
Or perhaps you want to offer add-on Widgets at the same price backers paid at their pledge level. In this case, you can clone your Widget product twice, change the prices to $29, $39, and $49, and then change the Extras offered for each level to Custom Extras.
You can also combine both scenarios. Let's say you want everyone to be offered the same extras, but your Super Early Bird Widget backers should have access to buy additional Sprockets for $10 less than everyone else. Since Custom Extras are set on a configuration-by-configuration basis, you can add the regular extras, and regularly-priced Sprocket, to the Global Extras, and for the Super Early Bird Widget configuration, you can offer them the specially-priced Sprocket. Only they will have access to this product.
Here's how to set up your survey's Extras page for any of the above situations.
Global Extras
To map products to your Global Extras, simply click on Extras. You'll see a list of your existing products on the left side, each with the familiar green + button. To map a product to Extras, just click that + button to move it to the right side, which means it will appear on the Extras page.

If you have a lot of add-ons, and want to organize them by sections, we have you covered. Just above the products list on the left side is a tab for Sections. Just click that, and you can create section headings (along with descriptive sub-headings) to break up your product offerings by kind. And, just like with your configurations, you can move and organize your products and sections with the handles on the left of the product and section names.
To make sure all of these add-ons appear on every configuration (except for your No Reward configurations), you just need to... do nothing. Global Extras are the default. If you do need to create some Custom Extras, however, it's just a few clicks to do so.
Custom Extras
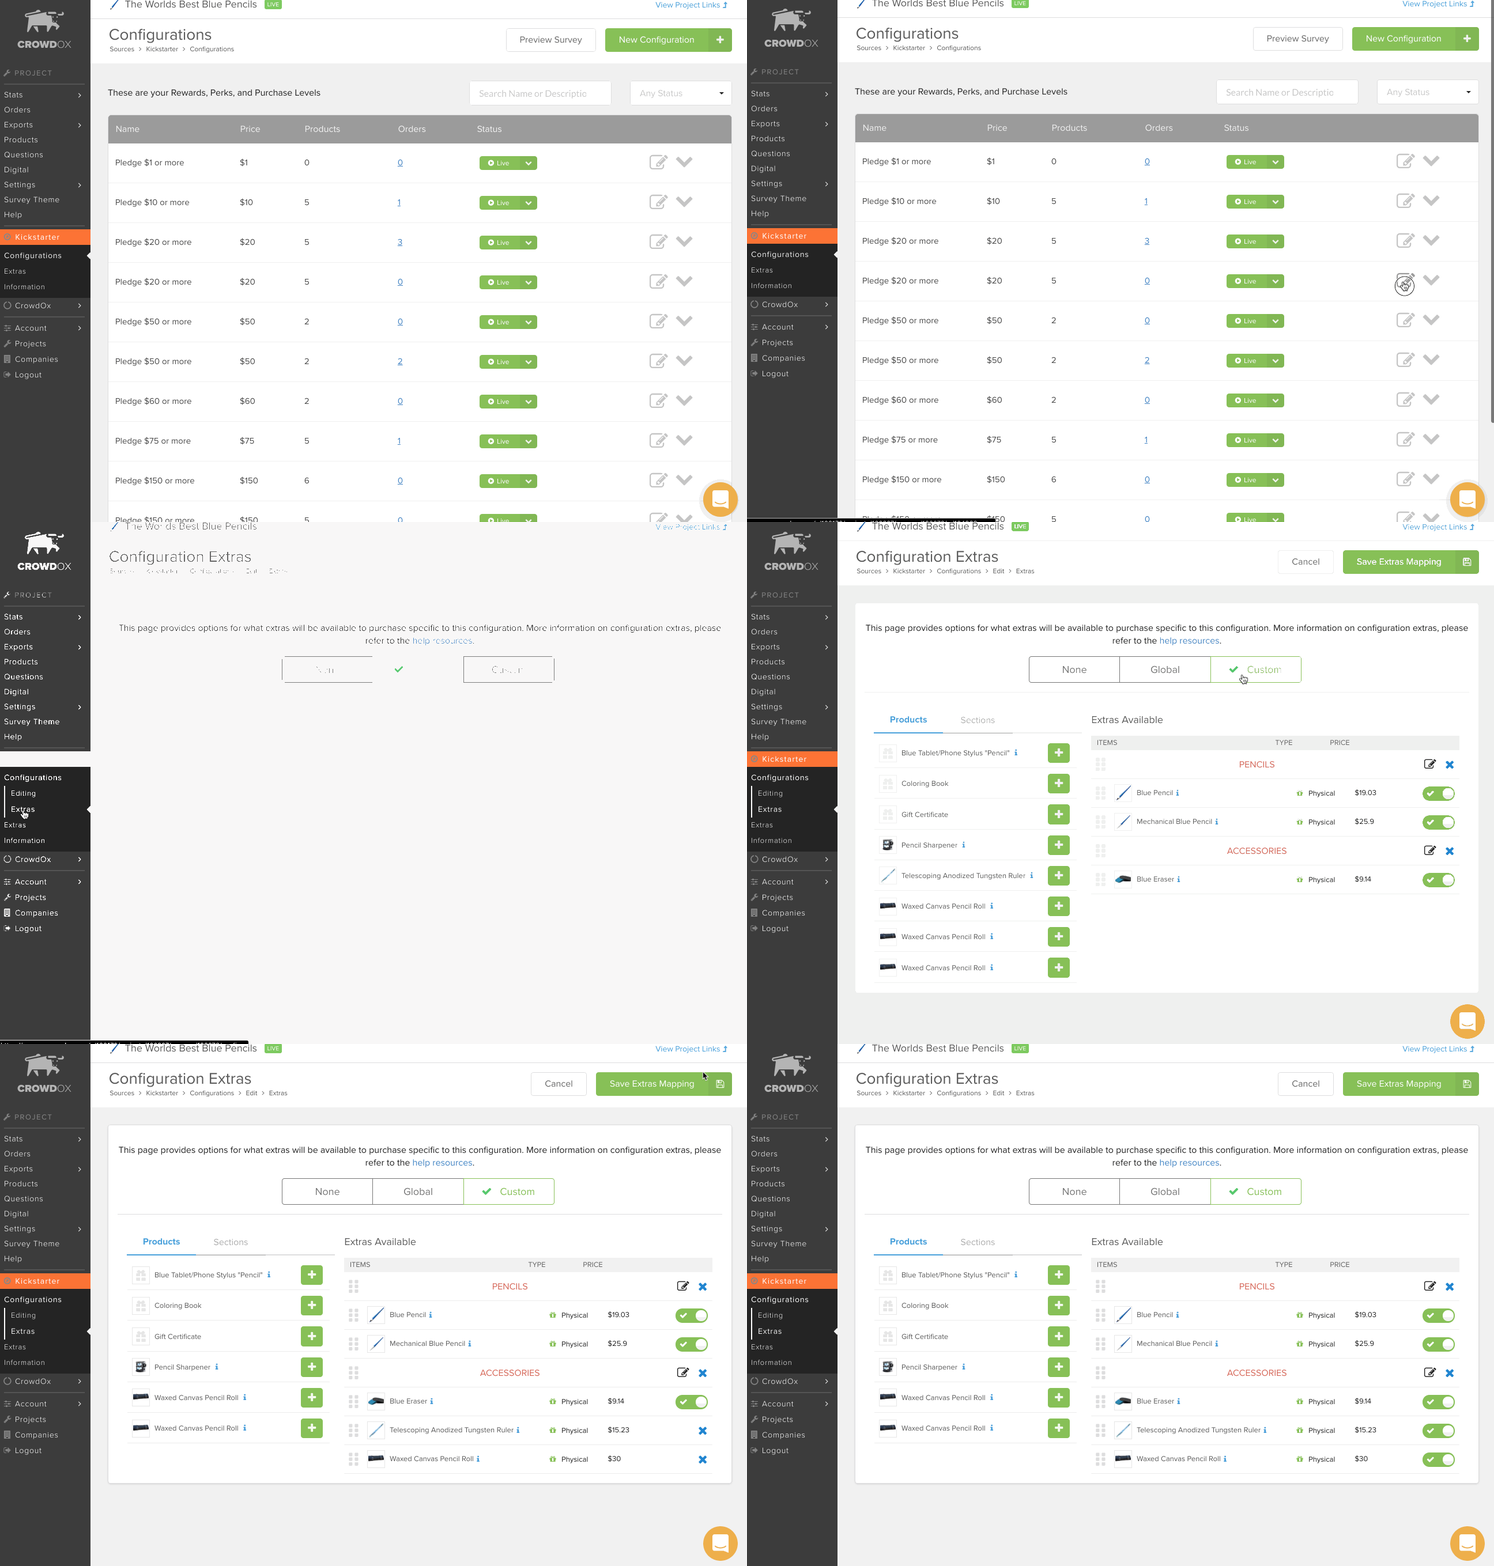
To add products to a Custom Extras page, go to Edit the configuration to which you want to add a Custom Extras page. On the left-hand menu, you will see an additional Extras menu item, attached to the Configuration menu item. This will take you to the Extras selection page.

By default, your regular configurations are set to Global extras, and your No Reward configurations are set to None, or no extras. To change the selection, just click Custom. This will open up the Extras mapping, just like for Global Extras; it will even be pre-populated with the same selections (which makes minor changes much easier to deal with). Now, you can arrange your Custom Extras for that configuration however you'd like, in the same way you set up Global Extras. Save your selections, and you're good to go!
By using the selection of Global or Custom for each configuration, you can see how easy it is to offer Custom Extras to all pledge levels, or just some pledge levels.
Next: Backerclub, Backerland, and other special membership offers. If you haven't offered these, you can skip ahead to reviewing your project settings.

